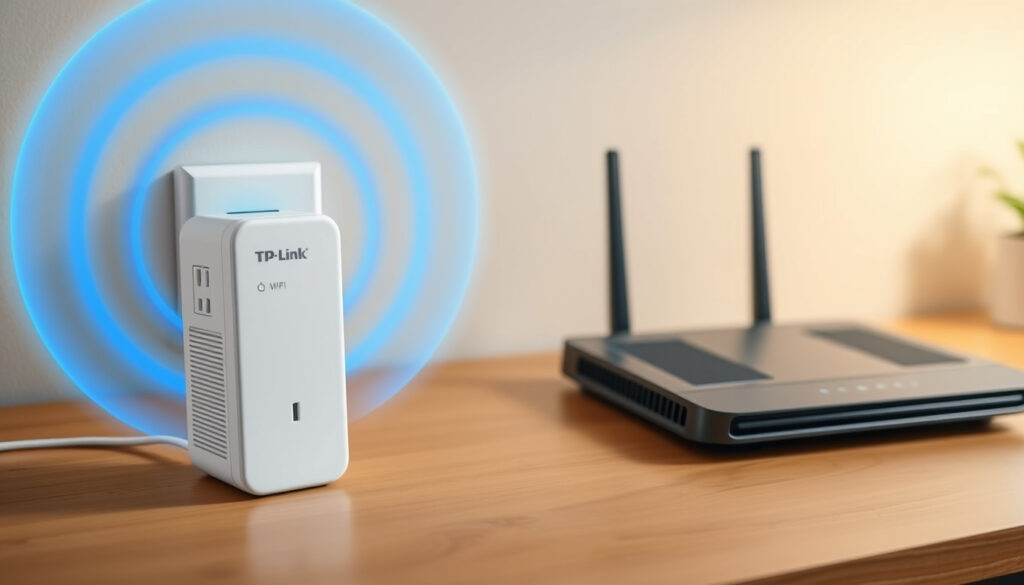
TP-Link WiFi Extender Setup: Connect, Pair & Reset Guide
WiFi dead zones frustrate every household. A TP-Link WiFi extender fixes that — but only if you set it up correctly. This guide covers every method: WPS push-button, web browser, and TP-Link Tether app, with step-by-step instructions and placement tips.
Max Coverage: 10,000 sq ft ·
Dual-Band Speed: Up to 750Mbps ·
Frequency Bands: 2.4GHz / 5GHz ·
Standards: 802.11 b/g/n/ac ·
Setup Methods: WPS, Web, App
Quick snapshot
- Press router WPS for 3 seconds, then extender within 2 minutes (TP-Link Beginner’s Guide)
- Fastest method — no computer or app required (TP-Link Beginner’s Guide)
- Access via tplinkrepeater.net or 192.168.0.254 (TP-Link Quick Guide)
- Full control over SSID naming and security settings (TP-Link Quick Guide)
- TP-Link Tether app available on App Store and Google Play (TP-Link RE205/RE305 User Guide)
- Mobile-friendly with OneMesh option for compatible routers (TP-Link RE205/RE305 User Guide)
- Move halfway between router and dead zone after pairing (TP-Link RE450 Quick Guide)
- Wait 1-2 minutes for Signal LED to turn solid blue (TP-Link RE450 Quick Guide)
How do I connect my TP-Link WiFi extender?
Connecting your TP-Link WiFi extender for the first time involves three main setup paths: the WPS button for the quickest option, the web browser for those who prefer manual control, or the TP-Link Tether app for a mobile-first approach. All three methods achieve the same result — a working extended network — but they suit different comfort levels and hardware situations.
WPS button method
The WPS method is the fastest way to pair your extender. According to TP-Link’s official beginner’s guide, start by plugging the extender into an outlet near your router. Wait 1-2 minutes for the Power LED to stabilize.
- Press and hold the WPS button on your router for approximately 3 seconds.
- Within 2 minutes, press the WPS button on your extender.
- Wait for the WPS LED to indicate a successful connection.
This method requires no computer or smartphone — just proximity to the router during the initial pairing phase. Once connected, you can relocate the extender to its final position between the router and your WiFi dead zone.
Web browser setup
For full control over your network settings, the web interface gives you more options. Access the setup portal at tplinkrepeater.net or via the default IP address 192.168.0.254, as documented in TP-Link’s EU Quick Guide. The default login credentials are typically “admin” for both username and password.
- Connect your device to the extender’s default network named “TP-Link_Extender” (TP-Link User Guide).
- Open a browser and navigate to the setup URL.
- Follow the on-screen prompts to select your home network and customize your extended network name.
- Create a new admin password during setup for security.
Web setup lets you choose whether to copy your router’s SSID and password or create a separate extended network. A separate network gives you control over which devices connect to the extender, while copying the SSID provides seamless roaming for devices as you move around your home.
TP-Link Tether app
The TP-Link Tether app turns your smartphone into a setup hub. Download it from the App Store or Google Play, scan the QR code on your extender or in the manual, and follow the guided process. The app also gives you ongoing management options including signal strength monitoring, connected device lists, and OneMesh configuration if your router supports it.
The pattern is consistent across all three methods: proximity during initial setup, configuration of your home network credentials, and then relocation to the optimal halfway position. What varies is the level of control and whether you need a computer or smartphone nearby.
How do I pair my WiFi extender to my router?
Pairing is the process of establishing a communication link between your extender and your existing router. The term is often used interchangeably with “connecting,” but it specifically refers to that initial handshake that allows the extender to relay your network traffic.
WPS pairing steps
For WPS pairing, the timing matters. TP-Link’s official guide specifies holding the router’s WPS button for 3 seconds before pressing the extender’s button within a 2-minute window. This sequencing ensures the devices establish a secure connection before the pairing window closes.
Manual pairing via interface
When WPS isn’t available or fails, manual pairing through the web interface or Tether app lets you select your router from a list of available networks. TP-Link’s compatibility FAQ confirms that extenders work with any WiFi router, not just TP-Link models — so you’re not locked into a specific brand ecosystem.
- Scan for available networks in the extender’s interface.
- Select your router’s network from the list.
- Enter your router’s WiFi password when prompted.
- Confirm the connection and wait for the link indicator.
For dual-band routers, TP-Link’s dual-band instructions recommend connecting the extender to both 2.4GHz and 5GHz bands separately if you want full coverage across both frequency options.
If your router uses altered or outdated firmware, the extender may not pair successfully. Updating your router’s firmware through its manufacturer portal can resolve intermittent pairing failures that aren’t explained by signal strength issues.
The implication: WPS pairing is fastest when it works, but manual pairing through the web or app interface gives you more control and diagnostic information when things don’t connect on the first attempt.
How to reset TP-Link extender to new Wi-Fi?
When you change internet service providers or update your router credentials, you’ll need to reconfigure your extender to connect to the new network. The process starts with a factory reset that clears the old configuration.
Factory reset button
Locate the reset button on your TP-Link extender — it’s typically a small recessed button that requires a paperclip or similar tool. Press and hold it for approximately 10 seconds until the LEDs flash or change, indicating the device has returned to factory settings. This clears all saved network credentials and returns the extender to its default state.
Reconfigure to new network
After resetting, the setup process begins fresh. Connect to the default “TP-Link_Extender” network, access the web setup portal, and follow the same steps as initial configuration: select your new router’s network, enter the updated password, and save your settings. You can also use the Tether app to reconfigure if you prefer the mobile interface.
- Hold reset button for 10 seconds until LEDs indicate factory reset.
- Connect to the default “TP-Link_Extender” network.
- Run the setup wizard and select your new network.
- Relocate extender to optimal position after reconfiguration.
According to TP-Link’s troubleshooting guide, if your IP address changes post-setup, resetting and reconnecting to the default network is the recommended fix. This ensures your device can properly access the setup portal.
The catch: resetting your extender means starting from scratch on every device that was previously connected to it. Devices that were set to automatically join the extended network will need to reconnect with the new credentials or network selection.
Do you just plug in a WiFi extender and it works?
No — plugging in the extender alone is only the first step. Without pairing it to your router and configuring it with your network credentials, the device sits idle and provides no connectivity improvement. The extender must go through the setup process before it can repeat and amplify your WiFi signal.
Initial plug-in requirements
When you first plug in your TP-Link extender, it needs time to boot up — TP-Link’s visual setup walkthrough recommends waiting 1-2 minutes for the Power LED to stabilize. Plug it into an outlet near your router initially; the extender needs a solid signal from the router during setup, which is why the temporary close proximity matters.
Post-setup relocation
Only after the pairing and configuration steps complete should you move the extender to its permanent position. TP-Link’s placement guidance specifies the ideal spot is halfway between your router and the WiFi dead zone, with clear line of sight and minimal obstructions. Avoid walls, appliances, or metal surfaces that can block the signal.
- Plug in near router — initial setup requires router proximity.
- Complete pairing and configuration process.
- Wait for the Signal LED to turn solid blue, white, or green (varies by model).
- Relocate to halfway point between router and dead zone.
- Aim for at least 3 of 5 signal strength LEDs lit.
Extenders need the router’s signal to work — but too close to the router defeats the purpose, and too far creates a weak relay chain. Finding that halfway sweet spot where the extender receives a strong signal while still covering your dead zone is what separates a mediocre setup from one that actually solves your coverage problem.
The pattern: initial proximity for setup, then strategic relocation for performance. Skipping the relocation step means you’re likely wasting the extender’s potential.
What is a Wi-Fi Range Extender and How Do They Work?
A WiFi range extender is a device that sits between your router and the areas where your WiFi signal weakens, capturing the existing signal, amplifying it, and retransmitting it under a new network name or the same SSID. This relay process effectively extends your network’s reach into rooms and floors that the router alone cannot cover.
Extender function basics
Think of an extender as a middleman in the WiFi conversation. Your router broadcasts the original signal; the extender receives it, processes it, and sends out a fresh signal to devices in its coverage area. TP-Link’s compatibility documentation confirms that extenders work with any standard WiFi router, not just TP-Link models, making them universally compatible with the 802.11n/g/b standards.
Signal boosting process
The quality of the extended signal depends directly on the strength of the router signal the extender receives. If the extender is placed where the router signal is already weak, it will rebroadcast that weak signal rather than creating a strong new one. TP-Link’s placement diagrams illustrate that optimal positioning means the extender sits where it still receives a robust signal from the router while casting a strong signal to the dead zone beyond.
The extended network typically appears as a separate WiFi name — though you can configure most extenders to copy your router’s SSID for seamless device transitions. Models with OneMesh technology, as documented by TP-Link’s feature guide, can synchronize settings automatically with compatible routers for truly seamless roaming.
The implication: an extender doesn’t create new bandwidth — it shares what the router provides. For bandwidth-heavy activities like 4K streaming across multiple devices, a mesh system or additional wired access points may serve better than an extender alone. If you’re experiencing persistent connectivity issues across your entire network, an NBN outage map can help you determine whether the problem originates from your ISP rather than your local network equipment.
Step-by-Step Setup Process
Three methods exist for setting up a TP-Link WiFi extender, each suited to different hardware situations and user preferences.
- Initial plug-in: Insert the extender into an outlet near your router. Wait 1-2 minutes for the Power LED to stabilize.
- Select setup method: Choose WPS for button-push setup, web browser at tplinkrepeater.net for manual control, or the TP-Link Tether app for mobile guidance.
- Connect to home network: During setup, select your router’s network from the available list and enter your WiFi password.
- Customize extended network: Decide whether to use the same SSID as your router (for seamless roaming) or create a separate network name.
- Wait for confirmation: The Signal LED should turn solid blue, white, or green within approximately 2 minutes of completing setup.
- Relocate to optimal position: Move the extender halfway between your router and the WiFi dead zone, avoiding walls and appliances.
- Verify signal strength: Check that at least 3 of 5 signal strength LEDs are lit, indicating good placement.
Placement is the most common reason extenders underperform. Even a perfectly configured extender will deliver weak speeds if it’s positioned where the router signal is already marginal. A few feet of adjustment — closer to the router during the first attempt, then finding that halfway sweet spot — can mean the difference between usable coverage and frustrating dead spots.
TP-Link WiFi Extender Specifications
Models like the RE200 and RE205 represent the AC750 class of extenders, offering a balance of coverage, speed, and compatibility for typical home setups.
| Specification | Details |
|---|---|
| Coverage | Up to 10,000 sq ft (varies by model) |
| Dual-Band Speed | Up to 750Mbps combined |
| Frequency Bands | 2.4GHz (up to 300Mbps) / 5GHz (up to 433Mbps) |
| Wireless Standards | 802.11 b/g/n/ac |
| Ethernet Ports | Available on some models (e.g., RE200, RE205) |
| Default Setup URL | http://tplinkrepeater.net |
| Default IP Address | 192.168.0.254 |
| Default Network Name | TP-Link_Extender |
| Operating Temperature | 0°C to 40°C (32°F to 104°F) |
| Power Requirements | EU Type C/F plugs, 230V compatible |
| Compatible Routers | Any WiFi router (universal standard) |
| Special Features | OneMesh (select models), WPS, Tether App |
Six key specifications define extender performance: coverage area in square feet, combined dual-band speed in Mbps, the wireless standards supported, available Ethernet ports for wired connections, and the operating temperature range that ensures safe indoor use. For Irish households, the universal EU Type C/F plug compatibility means no adapter is needed — the same setup process applies as elsewhere.
“Plug the extender into an electrical outlet about halfway between your router and the Wi-Fi dead zone.”
“The range extender works with almost any Wi-Fi router.”
tp-link.com, youtube.com, tp-link.com, tp-link.com, youtube.com, tp-link.com
Complementing the basic setup, the best models setup guide offers troubleshooting tips and model comparisons for optimal performance.
Frequently Asked Questions
How do I log into my TP-Link WiFi Extender?
Access the web interface by connecting to the extender’s default network (“TP-Link_Extender”) and opening a browser to tplinkrepeater.net or 192.168.0.254. Enter “admin” as both the username and password when prompted. For security, you’ll be asked to create a new password during first-time setup.
Where can I find the TP-Link WiFi Extender manual?
User guides are available on TP-Link’s official support website, searchable by model number. Quick installation guides are also included in the product box and accessible via QR code on the device itself.
Does TP-Link WiFi Extender work with any router?
Yes. TP-Link’s compatibility documentation confirms that extenders work with any WiFi router, regardless of brand. They support the universal 802.11 b/g/n/ac standards used by virtually all consumer routers.
What is TP-Link WiFi Extender AV600?
AV600 refers to the combined speed rating of older TP-Link models, offering up to 600Mbps across both bands. Current models like the RE200 and RE205 fall into the AC750 category with up to 750Mbps combined throughput, representing the current standard for typical home use.
Is there a TP-Link WiFi Extender app for Ireland?
The TP-Link Tether app is available globally on both the App Store and Google Play. It functions identically in Ireland, supporting the same setup and management features for all TP-Link extenders sold in European markets.
How to check TP-Link extender signal strength?
Most TP-Link extenders have LED indicators that show signal strength — typically 5 LEDs, where 3 or more lit indicates good placement. You can also check real-time signal quality through the Tether app or web interface under the status or monitoring section.
Can I use TP-Link extender with mesh WiFi?
Standard TP-Link extenders can connect to mesh routers, but they won’t provide seamless roaming unless the router and extender both support OneMesh technology. If seamless device transitions matter to you, check whether your mesh router is OneMesh-compatible before purchasing an extender, or consider upgrading to a mesh satellite unit instead.
For Irish users, the setup process requires no Ireland-specific adjustments — TP-Link extenders sold in Europe use standard EU Type C/F plugs compatible with Irish sockets, and the setup URLs and interfaces are identical to those used globally. When connecting devices like smart TVs or streaming sticks in your extended coverage area, refer to a device compatibility guide to ensure proper network configuration.
More related posts
 Kristi Noem: From Governor to DHS Secretary to Dismissal
 Chemist Warehouse Perfume: Best Deals, Scents & Guide
 Sarah Rafferty: Suits star’s net worth, red hair & more
 Punjab Kings vs Kolkata Knight Riders Match Scorecard IPL 2026
 NRL Grand Final 2025 Time: Kick-off, TV Schedule, and Date
 FC 26 Web App – Release Date Access and Full Guide
 Jonathan LaPaglia Axed: Why Australian Survivor Fired Him
 Michael Porter Jr. – Stats, Injuries, Career Timeline
